Proposed Technical Specification
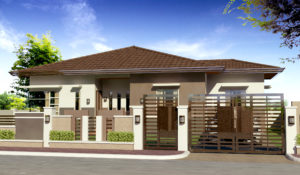
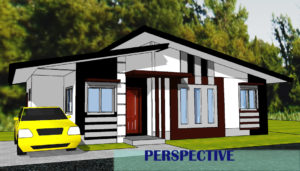
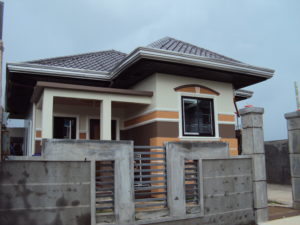
Technical Specification for Proposed One-Storey Residential Structure
Project Proposal: Proposed One-Storey Residential Structure
Address: Santis Subdivision, Santana Abucay, Bataan
Owner: Engr. JC Mer Herrera
Subject: Technical Specifications

General Requirements
A. The work to be executed shall be done in accordance with the accompanying plans and specifications
B. All works to be done shall be in the best quality of workmanship under the supervision of an Architect or a Civil Engineer
C. The construction shall conform to all the requirements of the National Building Code, as well as the local rules and regulations of the City or Municipality
D. Scope of Works
I. Site Preparation
II. Excavation
III. Backfilling
IV. Concrete of Works
V. Proportioning of Concrete
VI. Forms and scaffoldings
VII. Concrete Slab Floors on Fill
VIII. Steel Reinforcing Bars
IX. Masonry
X. Finishes
XI. Floor Finishes
XII. Tile Wall and Floor Finishes
XIII. Carpentry and Lumber
XIV. Roofing
XV. Doors and Windows
XVI. Electrical Works
XVII. Plumbing Works
XVIII. Metal
XIX. Painting
I. Site Preparation
The building site shall be leveled according to the plans and cleared of rubbish, roots and other perishable and objectionable matters to a suitable sub-grade.
All such unsuitable materials shall be removed from the building site and spread uniformly over the areas adjacent the proposed building, or otherwise disposed off as may be directed by the Architect or the Engineer in charge of the construction.
The contractor shall make the necessary temporary facilities such as the bodega and comfort room. This section also includes temporary connections of electrical and plumbing utilities.
Existing walls will not be demolished, instead will be used and reinforced as wall partition at Ground Level.
II. Excavation
All excavations shall be made to grade indicated in the drawings, where the building site is covered with any kind of fill, the excavation for footings should be made deeper until the stratum for safe bearing capacity of the soil reached.
Whenever water is encountered in the excavation process, it shall be removed by bailing or pumping, care being taken that the surrounding soil particles are not disturbed or removed.
III. Backfilling
After concrete for foundations reached the curing period to withstand pressure resulting from fills, the materials removed from excavations shall be used for backfills around them.
Backfills shall be placed in layers not exceeding 150mm in thickness, and each layer shall be thoroughly compacted wetting, tamping and rolling.
IV. Concrete Works
All concrete shall be mixed thoroughly until there is a uniform distribution of the cement and aggregates, and should be deposited as nearly as practicable in its final position, care being taken to avoid segregation of the aggregates.
Water to be used for mixing concrete shall be clean and free from injurious amount of oil, acids, alkalis, salts, and other organic materials.
All reinforced concrete columns, beams, and slabs shall be according to design as shown on plan.
Materials, Portland cement ASTM C 150, Type I, Sand ASTM C 897
V. Proportioning of Concrete
All concrete works shall be done in accordance with the standard specifications for plain and reinforced concrete as adopted by the Government. Cement to be used shall be HOLCIM Portland Cement or equivalent.
The following proportions of concrete mixtures shall be used for the various parts of the building:
Columns and Footings – Class A (1:2:4)
Wall Footings – Class A(1:2:4)
Reinf. Concrete Beams and Slabs – Class A(1:2:4)
Slab on Fill – Class B(1:2 1/2:5)
The fine aggregate for concrete shall consist of natural sand, or of inert materials with similar characteristics, having clean, hard and durable grains, free from organic matter or loam.
The course aggregate for concrete shall consist of crushed rock of durable and strong qualities or clean and hard gravel. Size of the course aggregate shall vary from 20mm to 40mm (3/4” to 1-1/2”)
VI. Forms and Scaffoldings
All forms for concrete shall be properly braced or connected together so as to maintain the correct position and shapes of the concrete members. Forms shall be constructed sufficiently tight to prevent bulging and seepage of water.
Forms shall not be removed until the concrete has attained sufficient strength to support its own weight and any loads that may be placed on it.
Scaffoldings must be properly braced to prevent accidents. Scaffolding materials may be lumber or steel.
VII. Concrete Slab Floors on Fill
Concrete slabs on fill shall be poured on a gravel bed not less than 100mm thick. Each concrete slab course to be poured shall not be more than one meter wide, and each course shall be poured alternately to the indicated floor finish.
VIII. Steel Reinforcing Bars
All steel reinforcing bars to be used in the construction shall consist of round deformed bars with lugs, projection on their sides to provide a greater bond between the concrete and the steel. Sizes range is 10mm dia., 12mm dia., 16mm dia.
All steel reinforcing bars shall be accurately placed and secured against displacement by tying them together at each bar intersection with Gauge #16 galvanized iron wire.
The steel reinforcing bars indicated for footings, columns, slabs, beams, girders and other concrete members shall all conform to the number, size and spacing as indicated in the drawings or schedule of steel reinforcements.
IX. Masonry
Concrete hollow blocks to be used in this project shall be 5 inches thick.
All exterior concrete hollow blocks to be used for the first floor walls shall be at least 150mm thick, while concrete hollow blocks for interior walls unless otherwise indicated, shall be 100mm thick. For interior CHB walls where plumbing pipes and fittings shall be located, the thickness shall be at least 150mm thick.
Concrete hollow blocks to be used for walls above the first floor, shall be 150mm thick.
The concrete hollow block walls shall be laid, and the cells filled with cement mortar consisting of 1 part Portland cement and 3 parts sand by volume. They shall be reinforced with round deformed bars, 10mm diameter, spaced not more than 1.20 meters on center, both ways.
X. Finishes
Interior walls shall be of Smooth Plain Cement Plaster finish unless otherwise specified in the plans.
Exterior walls shall be of Smooth Plain Cement Plaster finish.
This section includes Portland Cement Plaster materials
a. Base – Coat Cement: Portland cement, ASTM C 150, Type I
b. Job – Mixed Finish Coat: ASTM C 926, Portland Cement, ASTM C 150 Type I
c. Sand Aggregates for Base Coat: ASTM C 897
d. Water: Potable and clean
XI. Floor Finishes
All materials to be used as floor finishes for the rooms shall be plain cement finish and general areas of the building shall be plain cement finish.
XII. Tile Wall and Floor Finishes
The toilet and bathroom floors shall be finished with 0.20m x 0.20 CERAMIC TILES and approved equivalent
The walls of the toilets, bathrooms shall be 0.20m x 0.30m CERAMIC TILES and approved equivalent.
XIII. Carpentry and Lumber
Lumber shall be approved quality of the respective kind required for the various parts of the work, self seasoned, thoroughly dried and free from large, loose and unsound knots, sap, shakes or other imperfections impairing its strength, durability and appearance. Tanguile shall be used for door jambs, corbets, hangers, ceilings joist and other framings. Lumber standards must comply with Philippine Lumber Standard and with applicable grading rules of local inspection agencies.
XIV. Roofing
The roof shall be covered with 0.40 mm Color Roof Rib Type roofing. The roofing sheet shall be secured to the purlins. Gutter will be Pre-Painted Spanish Gutter. All accessories must conform to standard of ASTM. All overlaps and connections must be properly screwed and riveted.
XV. Doors and Windows
This section includes Solid Wood Doors and Hollow – Core Doors
Material: Kilm Dry “J. Melina” for solid door and ordinary tanguile for hollow – core wood doors and approved equivalent.
Install wood doors to comply with manufacturer’s written instructions, referenced quality standard, and as indicated on drawings.
PVC door shall be in quality standard “POLY DOOR” brand or approved equivalent; Extend and Location: Toilet and Bath
This section also includes standard Aluminum Framed (analok) Windows with ¼’ thick bronze glass. Materials shall conform good quality and to be installed by the required fabricator and must comply with manufacturer’s specification and recommendations for installation of window units, hardware, operators and other components of the work.
XVI. Electrical Works
Basic Electrical Requirements
A. All electrical works shall be done in accordance with all applicable current edition of the Philippine Electrical Code and shall conform to requirements, agencies and Power Company with jurisdiction over this project. All work for this installation shall be done under the direct supervision of duly licensed Electrical Engineer or Master Electrician.
B. All electrical materials, devices, fixtures, fittings and hardware shall be of suitable and approve type for location purposes.
XVII. Plumbing Works
All plumbing works for this project shall be done in accordance with the approved plans and under the direct supervision and control of a licensed Sanitary Engineer or Master Plumber.
Piping shall be properly graded or pitched to ensure easy circulation, drainage and prevent water hammer and noise.
The plumbing installation shall conform with the provisions of the National Plumbing Code and the rules and regulations enforced in the locality.
Piping for drain, waste and vent shall be done using GI push – on system. For the in-house water supply installation, GI pipes and fittings shall be used.
The plumbing fixtures and accessories to be provided and installed shall be follows:
Water Closets – COOL or approved equivalent
Lavatories – COOL or approved equivalent
Kitchen Sink – Stainless
Shower Heads – COOL or approved equivalent
Soap Holder – COOL or approved equivalent
Toilet Paper Holder – COOL or approved equivalent
Floor Drain – COOL or approved equivalent
Where a sanitary sewer system of sewage disposal is not in operation in the locality, standard septic vault shall be constructed as shown in the drawings.
XIII. Metal
Steel Grills and Ornamental Railings
A. General: For smooth fabrications exposed to view in the completed work, provide materials with smooth, flat, surfaces without blemishes. Do not use materials with exposed pitting. Seam marks, roller marks or roughness.
B. This section includes ornamental railing fabricated from custom shapes.
C. Steel and Iron: Provide steel and iron in form indicated to comply with the following requirements
Tubing: Cold formed, ASTM A 500
Steel Plate, Shapes and Bar: ASTM 36
XIV Painting
A. This section includes surface preparation and field painting of the following:
Exposed exterior items and surface
Exposed interior and surfaces
Surface preparation, priming and finish coast specified in this section are in addition to shop priming, and surface treatment specified in other sections.
B. Material Compatibility: Provide block fillers, primers, undercoats, finish-coat materials and related materials that are compatible with one another and the substrates indicated under conditions of service and application, as demonstrated by manufacturer based on testing and field experienced.
C. Materials Quality: Provide manufacturer’s best quality paint material of the various coating types specified. Paint-material containers not displaying manufacturer’s product identification will not be acceptable.
Proprietary Names: Use of manufacturer’s proprietary product names to designate colors or materials is not intended to imply that products named are required to be used to the exclusion of equivalent products of other manufacturers.
Cementitious Filler: Not shrink formulations; white Portland cement with fine silicate aggregate, zinc-oxide pigment, and reinforcing chemical binder as approved.
Thinner: As recommended by each manufacturer for the respective product.
Equipment: Provide scaffolding, staging, drop cloths, covers, brushes, rollers and spraying and other equipment of the type, grade and size required for the proper execution of work.
D. Color: Colors of items or surfaces to be painted are indicated on the drawings and schedules. Provide custom color of the finished paint system to match the Architect’s sample.
E. Mixing: All materials shall be factory or supplier mixed to proper application consistency. Perform job mixing and tinting only as approved by the Architect.
F. Application:
General: Apply finish systems in accordance with the manufacturer’s written instructions. Use applicators and techniques best suited for substance and type of material being applied. Apply to the dry film mil thickness for each coat as recommended by the manufacturer. Finish coats shall cover substrate and produce a uniform finish surface, free form from sags, lap mark and other defects.


 The following are some checklist when hiring an electrician:
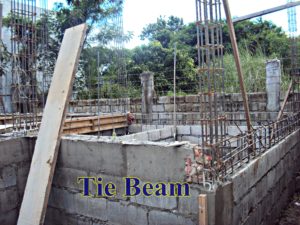
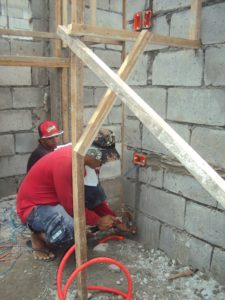
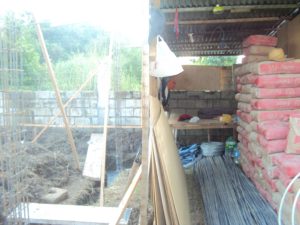 Site preparation is one of the first step to be done before starting construction works. It is very important to be prepared such as ready all the materials needed as well to clean the site before the construction process. It consists of clearing away all the trees and grasses from the site and doing whatever rough grading and staking the house location in preparation for installation of the footings and foundation.
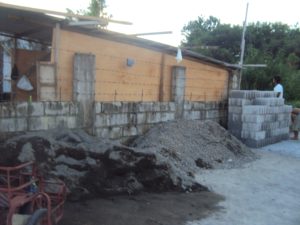

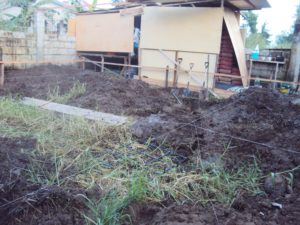
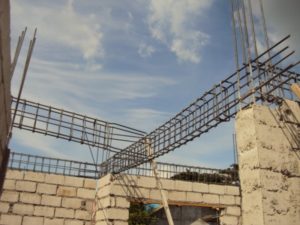 Building your dream house is a complex decision to make. It entails a lot of planning so that you may avoid some mistake during construction. So it is very important to seek advice to those are already have experience or from the expert or professional such as architect or engineer. But of course, you to choose a right person depending to their reputation. Remember some mistake can be very costly.
 According to Investopedia, bungalow is a single-storey house, cottage or cabin. It is generally small in terms of square footage but you can see also large bungalows. It is originally designed to provide affordable and convenient housing.
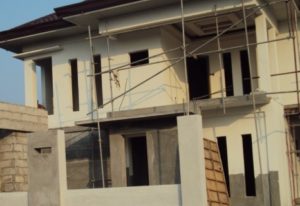 We can avoid construction delays if we are aware of the common causes of delays and foresee it and be ready for the appropriate action.
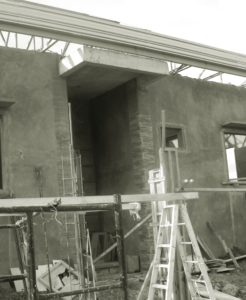 No matter how careful you are, delays is not avoidable because weather is change, and people is change that is why it is important that we should be aware of the causes of delays during house construction. Delay is common because constructions is complicated and involve a lot of different people. Everyone must be working together to avoid delays. The contractor will suffer because of the overhead expenses as well as owner of the house.